Butcher blocks generally comes with an eased edge, but this doesn’t mean it has to stay that way. There are a number of ways you can change the edge profile in order to further customize your butcher block. The best and easiest way to do this is with a router and bits. Continue reading for the best practices and tips for routing the edges of your Hardwood Reflections Butcher Block.
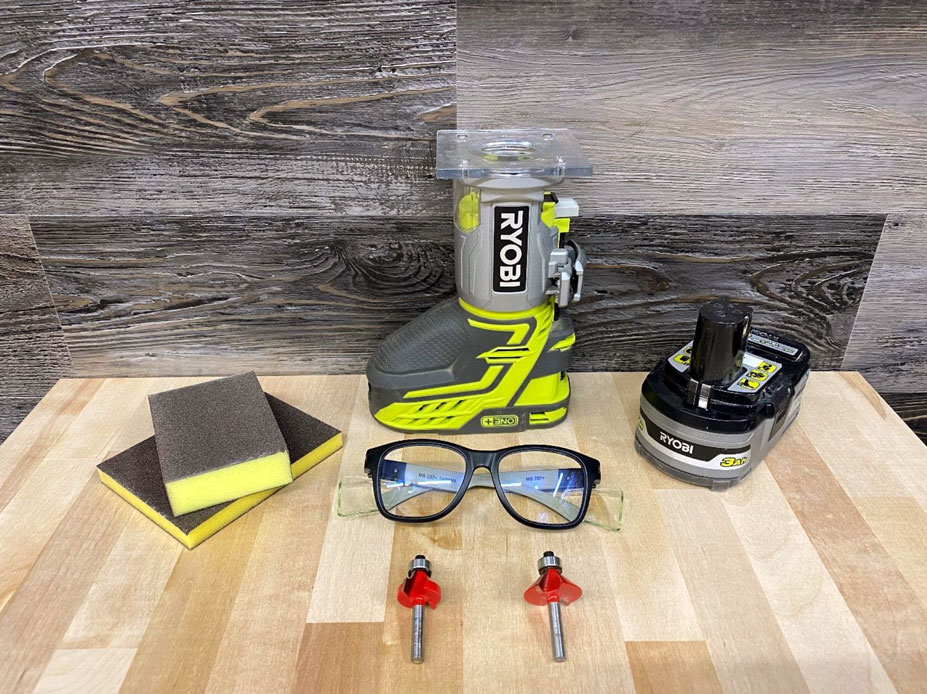
Tools You’ll Need…
-
- Safety Glasses
- Router
- Router Bits
- Sanding Block or Sanding Sponge
Safety First
Before you start any DIY project, safety should always be the top priority. This means Personal Protective Equipment (PPE) should be worn at all times. Also review all safety instructions provided with the tools you plan to use for the project.
Pro Safety Tip – The sharper the router bit, the safer the cut. Sharp, new bits cut cleaner and more efficiently. This means less risk of chipping and tear out.
Routing Your Butcher Block
The Router
For this project a fixed-base router is perfect. Check out this helpful guide to understand the types of routers: Types of Wood Router Tools
Router Bits
There are many different types of profiling router bits. We will be showing you the two most popular. To better grasp what type of bit you’d like, check out the profile image shown on all router bits or test the ones you have on a scrap piece of wood.
- Chamfer Bit –Cuts a bevel on the edge of the work piece.

- Round over – Does what it says, Rounds over the square edge.

Pro Tip – Router bits come in two different types. ½” Shank and ¼” Shank. The Shank refers to the shaft diameter. Be sure to check your router manual for required shank size.
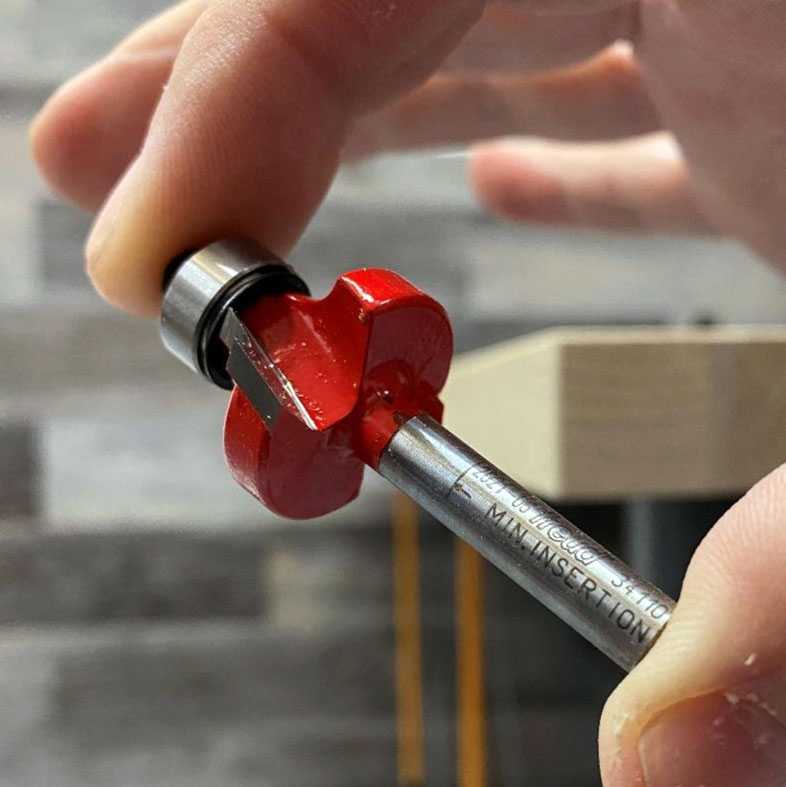
Inserting your Bit
SAFETY TIP – Unplug or remove battery first.

- Loosen the collet nut with the provided wrench. (See tool manual for assistance)
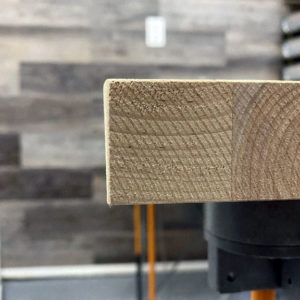
- Insert until the insertion line printed on the bit shank. (See photo below)
- Tighten the collet nut to secure the bit in place.
Adjusting the Cut Depth
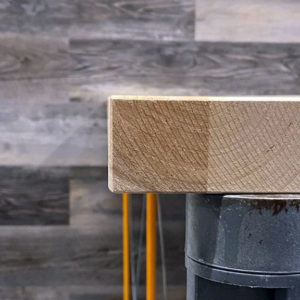
SAFETY TIP – If you plan to remove a lot of material, be sure to make multiple passes while increasing the depth of cut after each pass. This will help avoid burning, chatter marks, chips, and blowouts. Below is a picture showing the differences between the two depths of cut.

- Place router base on work surface.
- Using the depth adjustments, raise or lower the bit to desired height
- Lock depth in place.
PRO TIP – Use a scrap piece of wood to determine your desire depth of cut.
Routing the Edges
- Place router base on work surface with the bit not touching the wood.
- With a firm grasp to avoid the router from kicking, turn on router.
- In a COUNTER CLOCKWISE direction, (OR against the rotation of the spinning bit) follow your router along the edge of the workpiece. Allow the bearing to ride along the wood while keeping the baseplate FLAT on the working surface.
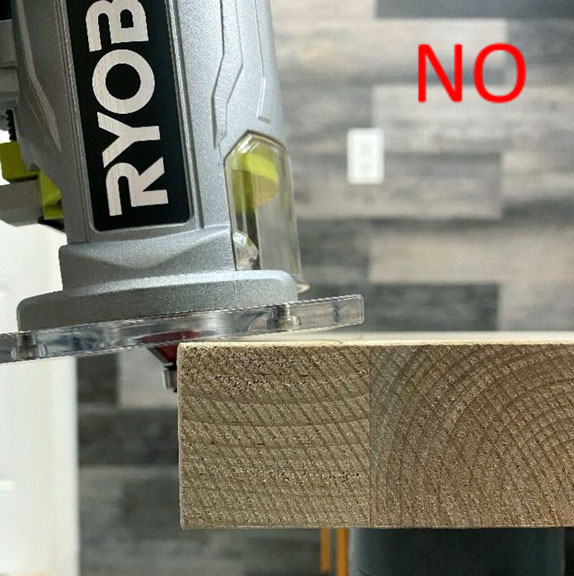
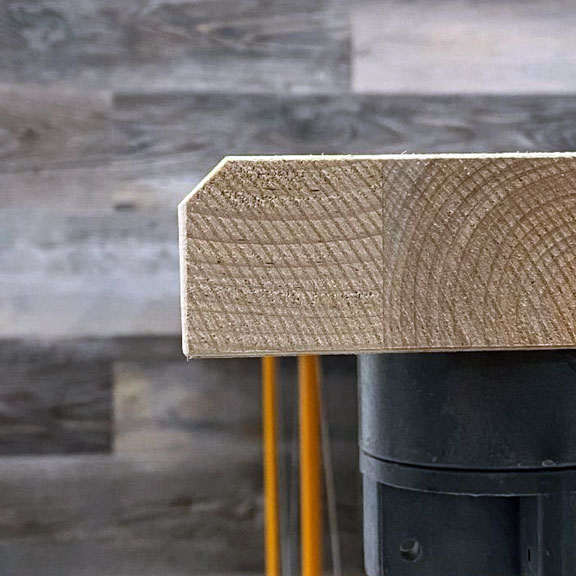
Improper Use of the Router on the Butcher Block
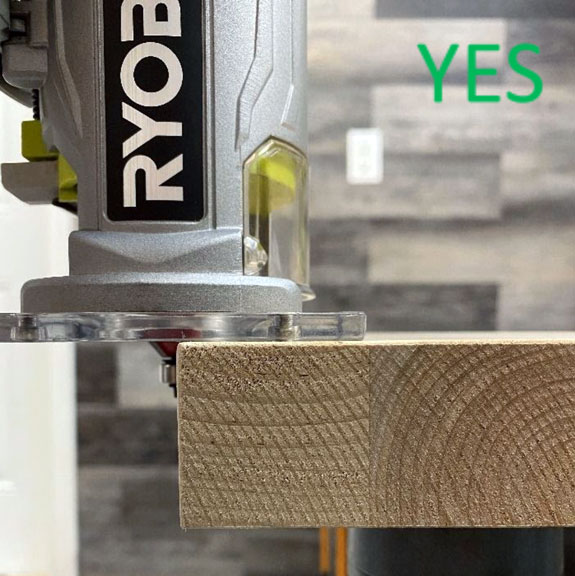
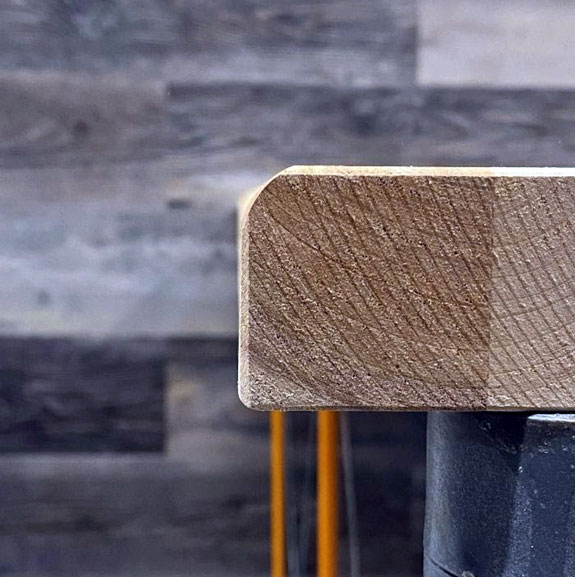
Correct way to router your butcher block
- Complete cut, remove bit from wood, and turn off router.
Sanding
- Using a sanding block or sanding sponge will help remove any burn marks or imperfections.
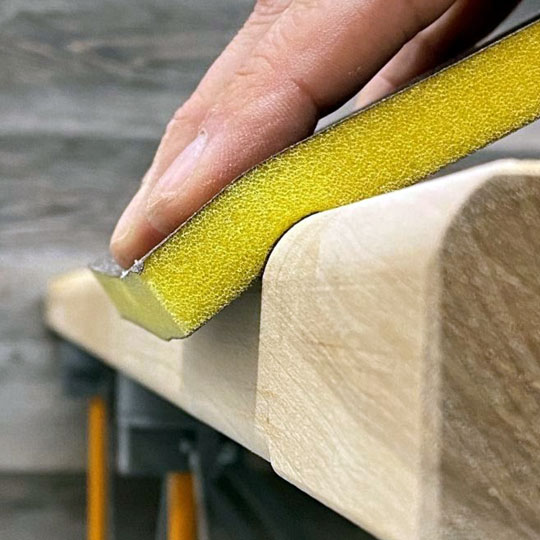
Sanding sponge works best for round over or other detailed profile bits
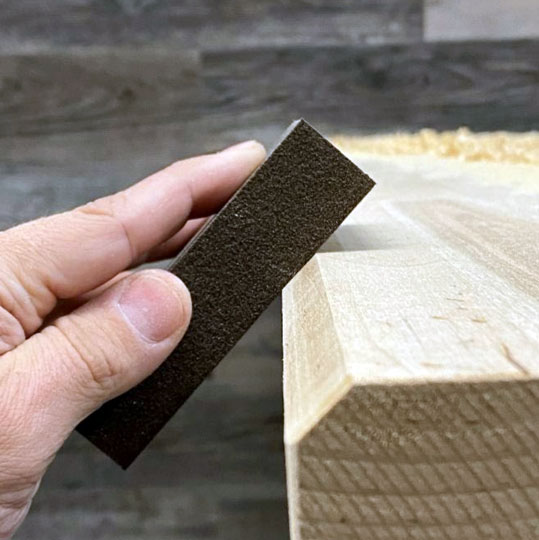
Sanding block works best for chamfered edges as you can lay the block parallel to the chamfered edge.