You can enter to win a Home Depot Gift Card after reading this Tutorial!
Sometimes space is limited but you still need a work surface to get things done. Enter the Countertop in a Box. This DIY tutorial will guide you to installation in about 20 minutes.
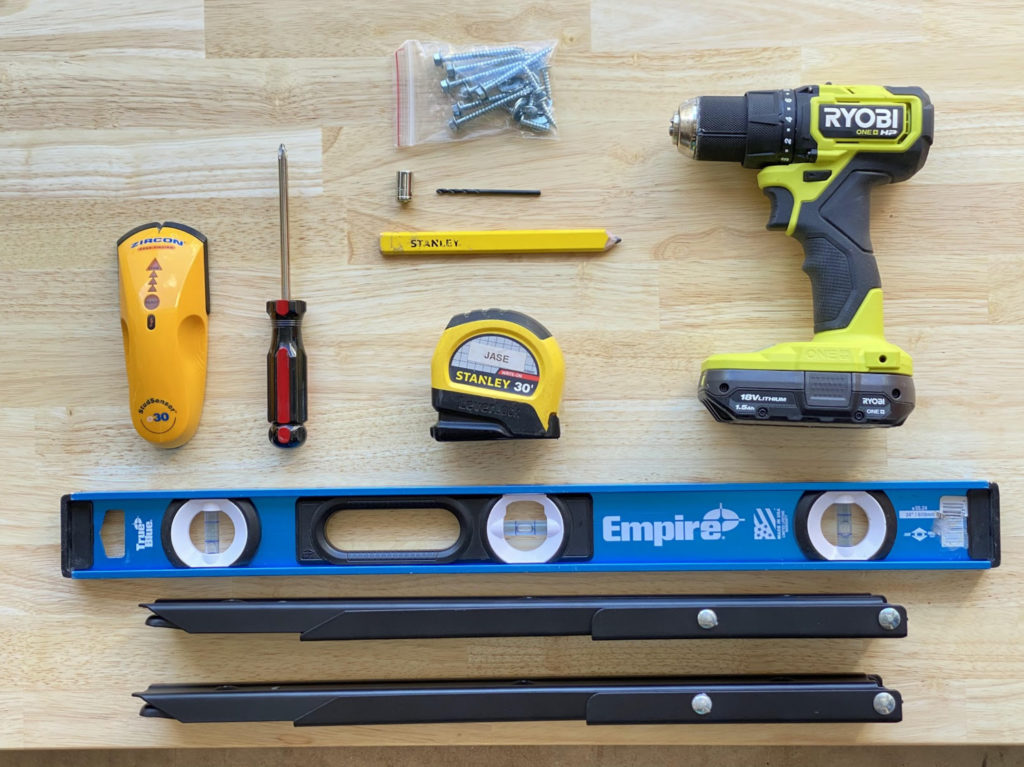
Tools You’ll Need
- Safety Glasses (not pictured)
- Drill
- Drill bits
- Tape Measure
- Wrench or Socket set
- Phillips Head Screwdriver
- Stud Finder
- Level
- Pencil
Step 1 – Determine Desired Height
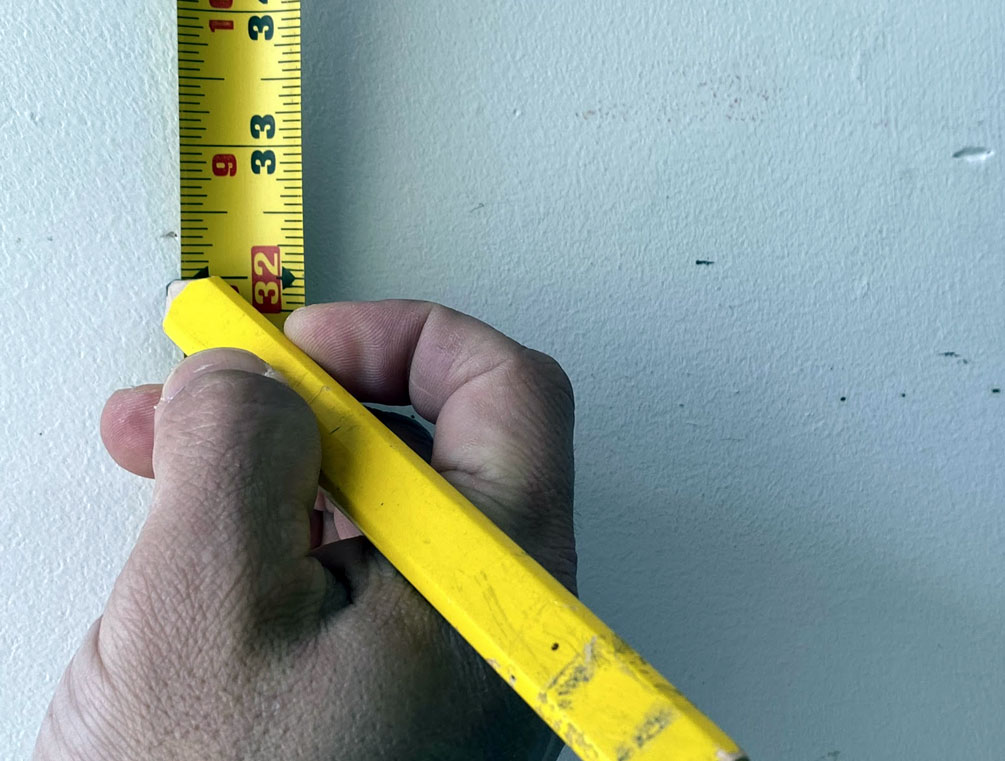 The intended use of your countertop will help determine your height.
- Table Height = ~30”
- Counter Height = ~36”
- Bar Height = ~42”
Once you determine your height, subtract 1-¼ inch to account for the thickness of the top and make a mark. This mark will now indicate the top of the brackets when installed.
Step 2 – Draw a Level Height Line
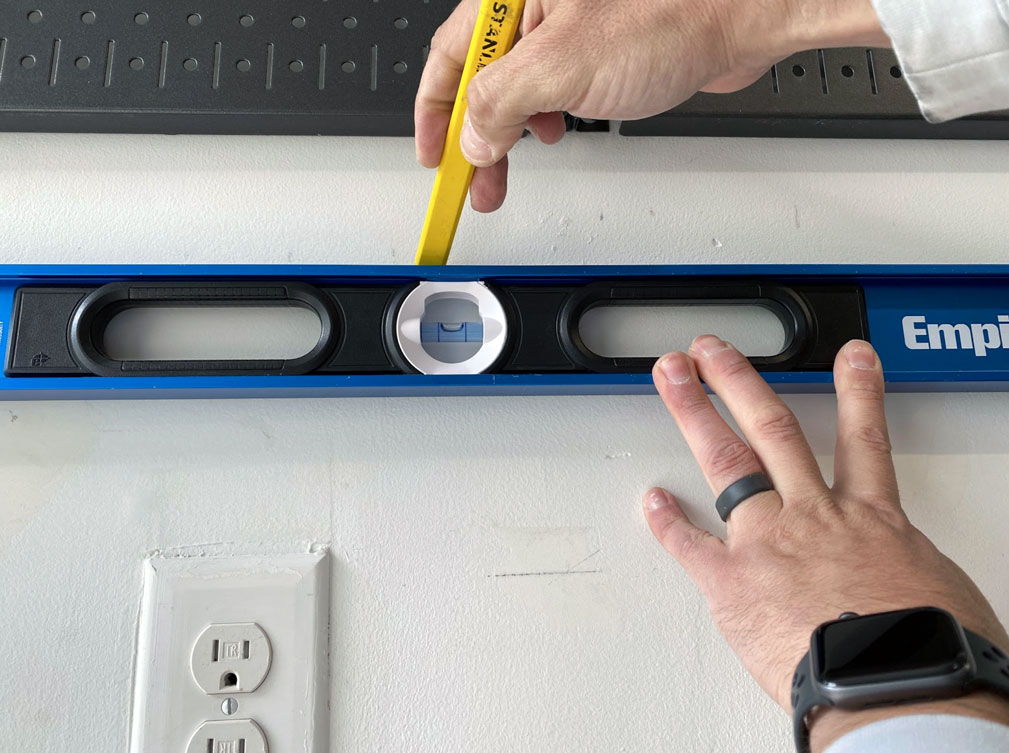 Extend your mark using a level as a straight edge.
Pro Tip: The bubble always flows to the high side. Take that into account when adjusting the level to mark your line.
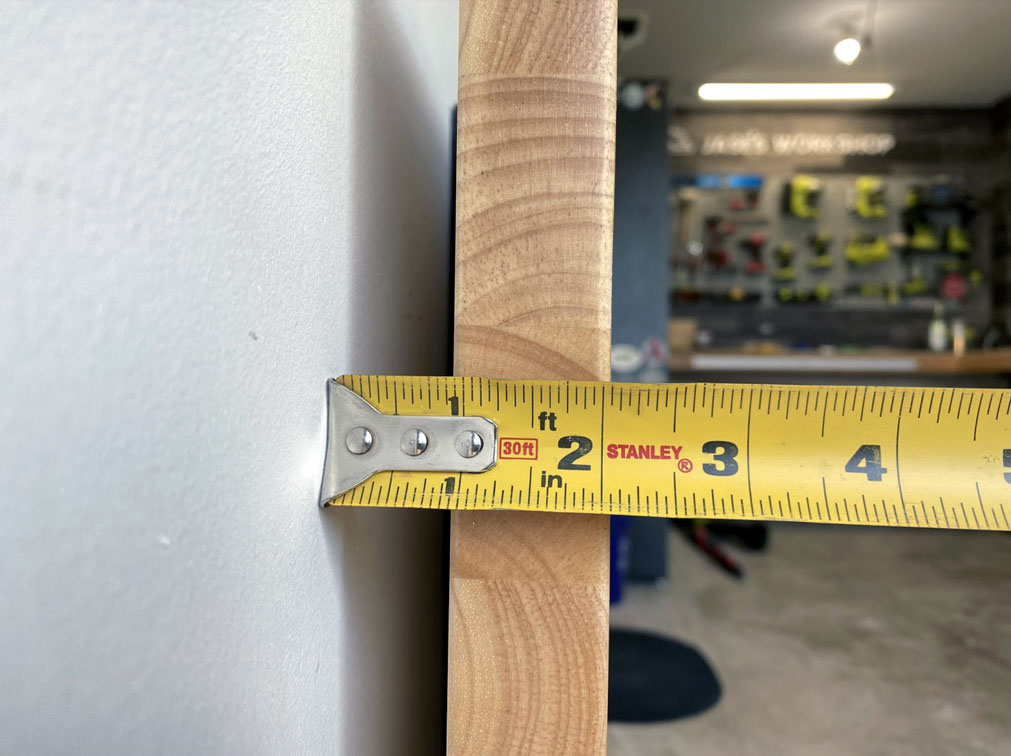
Step 3 – Find Those Studs
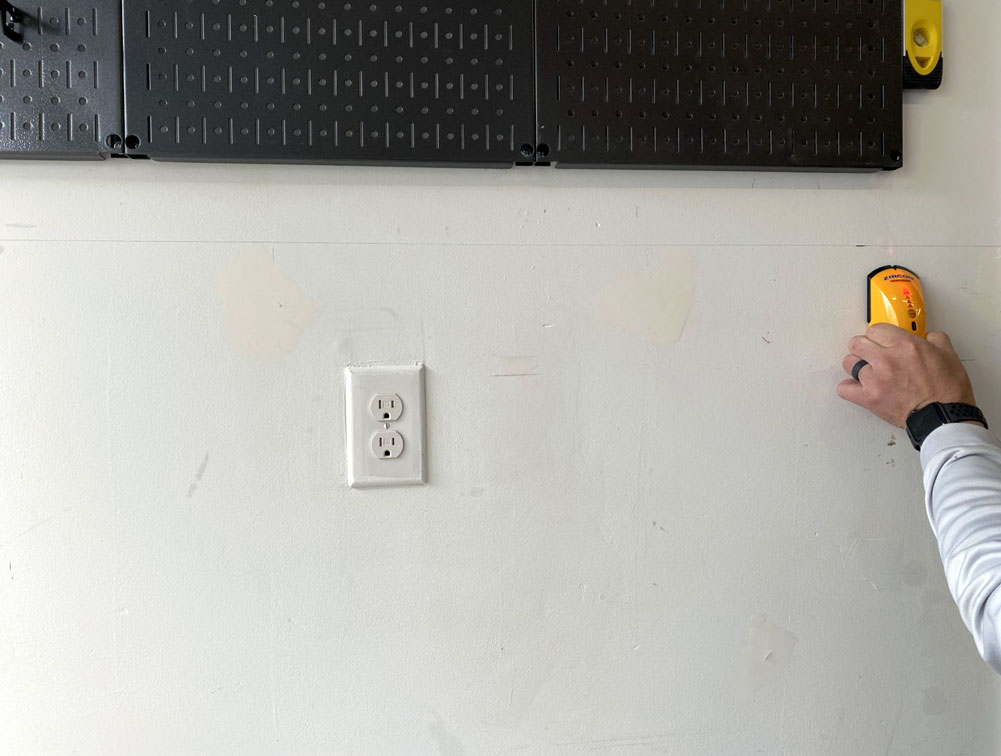
Each bracket MUST be attached to a wall stud. Use a stud finder to locate the studs in your wall and mark them on your height line.
Pro Tip: Use your level to extend a line down indicating stud location.
Pro Safety Tip: Most stud finders have built-in wire warning sensors to alert you of nearby electrical wires . Listen to the sensor to avoid drilling into a wire.
Step 4 – Mark Mounting Holes
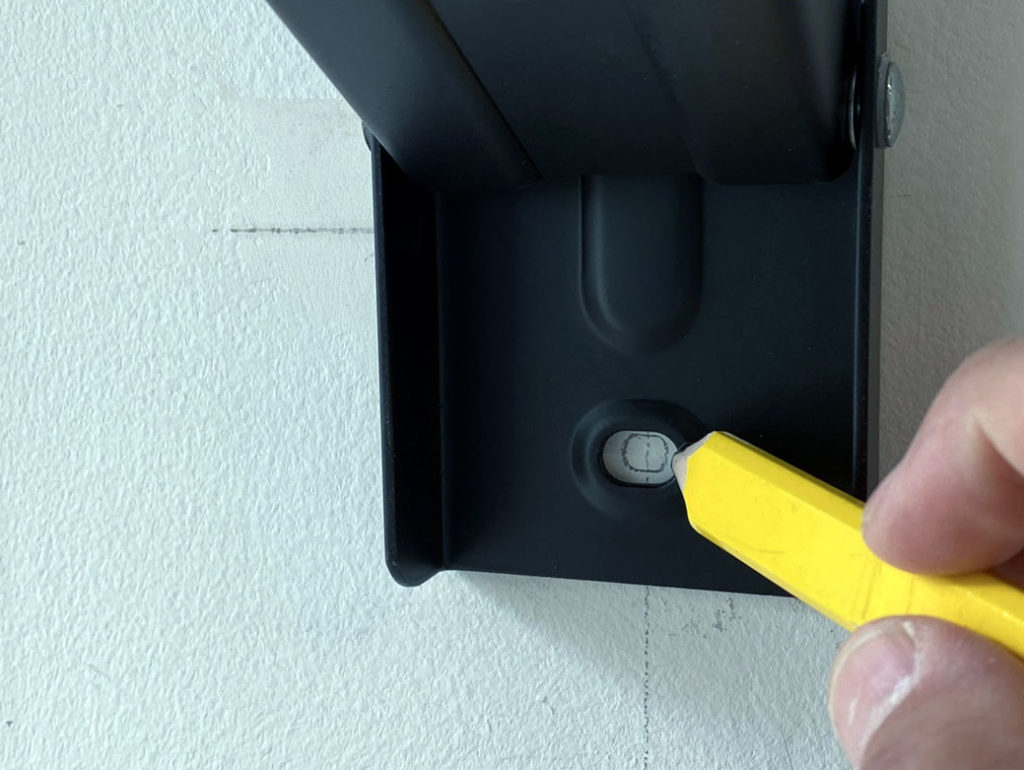
Align the bracket top with your horizontal line (predetermined height), and center your mounting holes on the vertical line. (stud location) Trace to indicate location of pilot holes.
More Details
Step 5 – Pre-drill holes for bracket lags
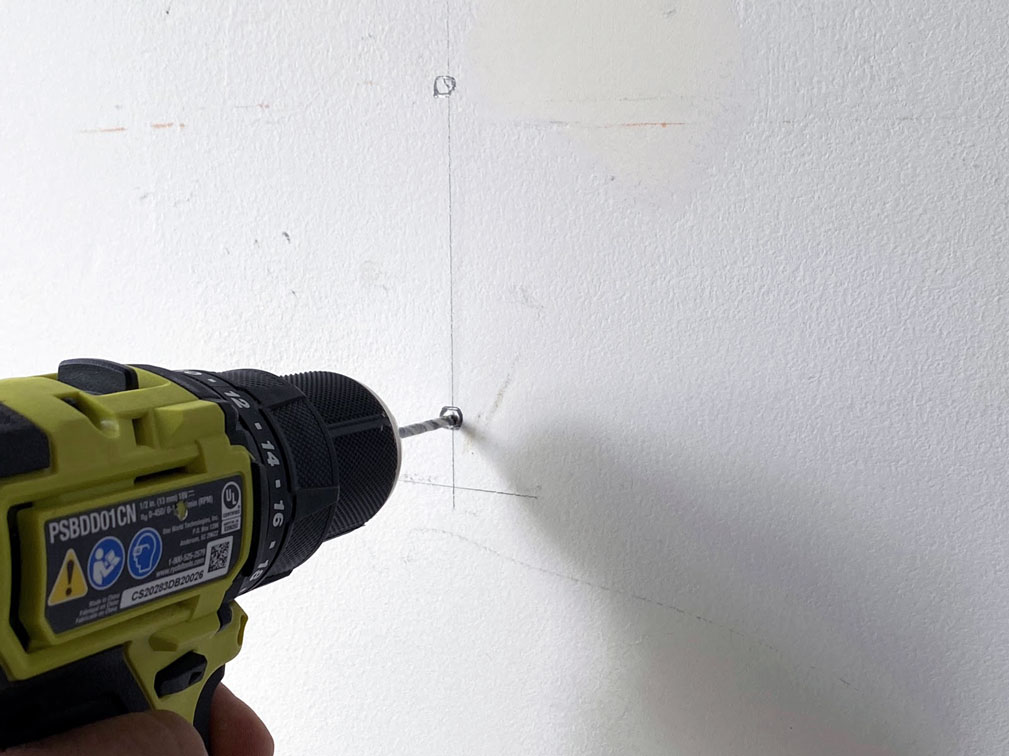
We recommend using a 5/32” drill bit for your pilot holes. The lag screws will be easier to attach and the pilot holes will lessen the likelihood of splitting the wood stud.
Step 6 – Attach Brackets to the Wall
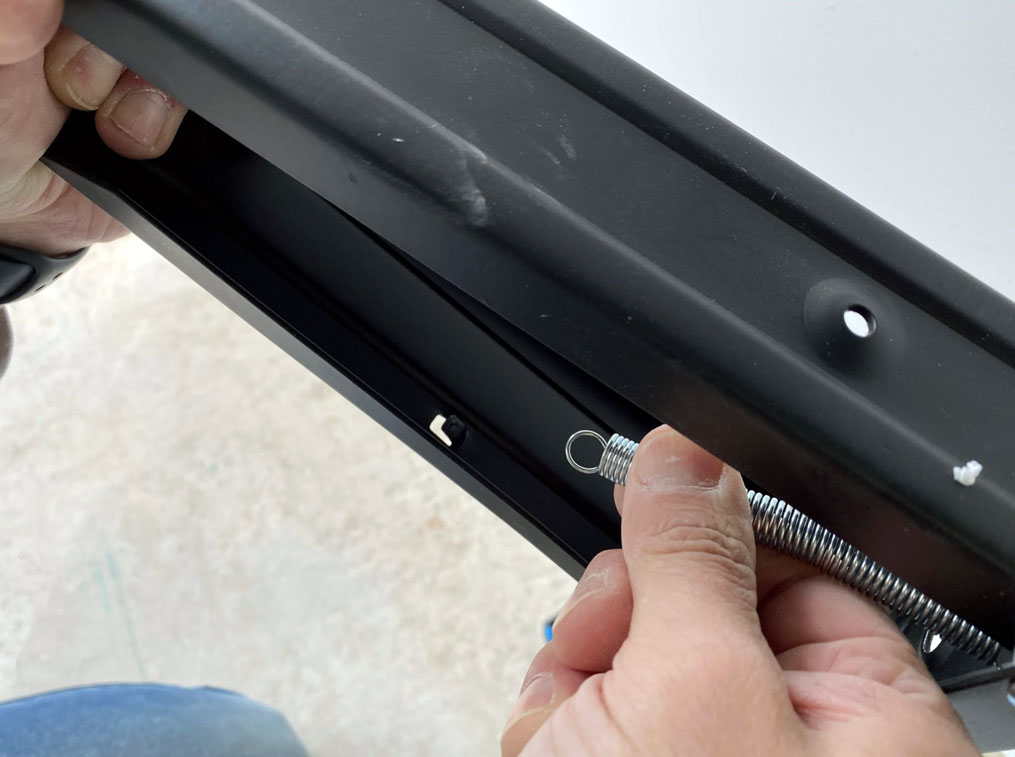
Remove the spring from the hook on the bracket to make attaching easier. Folding them down works too, but they may spring back up and hit your most important tool, your hands. Ouch!
Pro Tip: Work Smarter Not Harder!
Align the bracket with your pilot holes. Drive the lag bolt into the top hole but DO NOT tighten all the way.
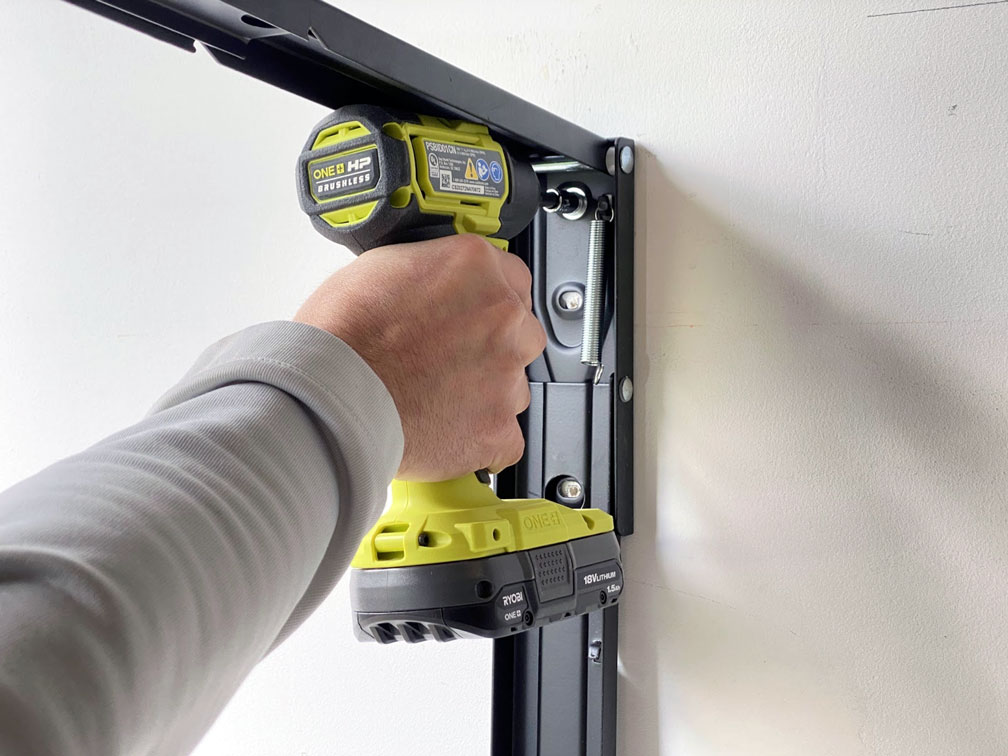
Pro Tip: An impact drill driver with a socket head works best for this step, but a regular drill will work too.
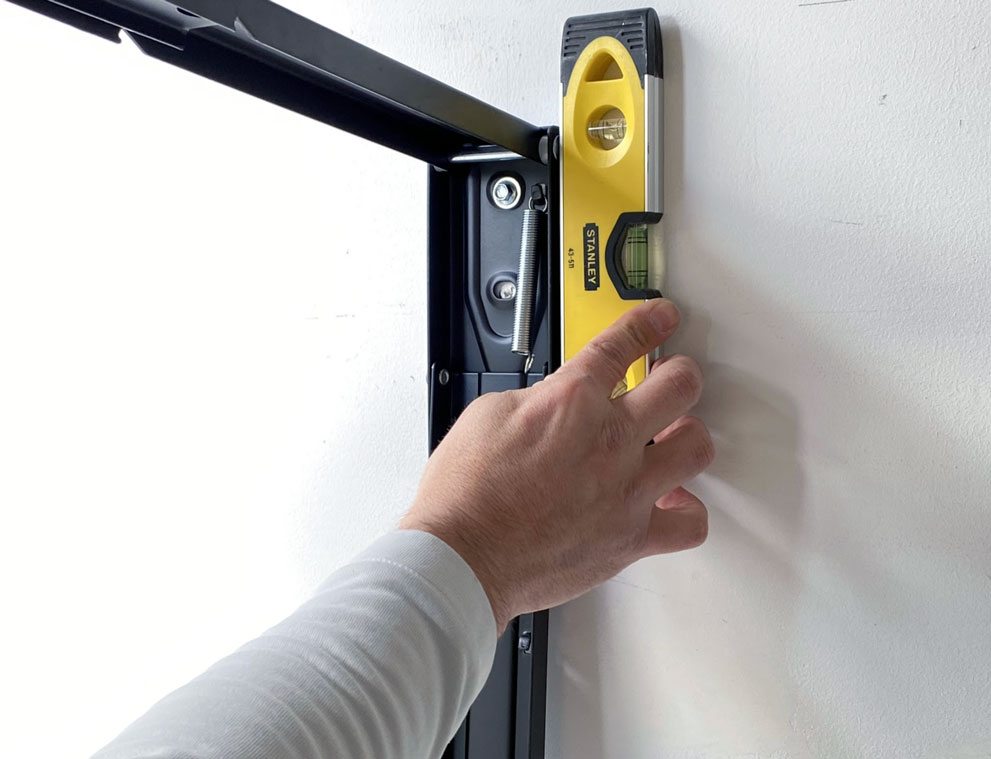
Use a level (torpedo level pictured) to make sure your bracket is perpendicular to the floor. Tighten the top bolt first then drive in the remaining two. Repeat for the second bracket, but check out this sweet Pro Tip first.
Pro Tip: Throw a level on the secure bracket before attaching the second one to confirm your brackets are perfectly level with each other. This will prevent the brackets from binding up when opening and closing your worktop.
FRIENDLY REMINDER: Reconnect the springs from earlier.
Step 7 – Attach the Top
Lay the top on the brackets, pushing it back to the bracket stop tabs near the wall. Center the top by measuring the distance from each bracket to the top’s side edge. Drill 3 pilot holes for each bracket. Bend the latching arm down to reach the final holes closest to the wall.
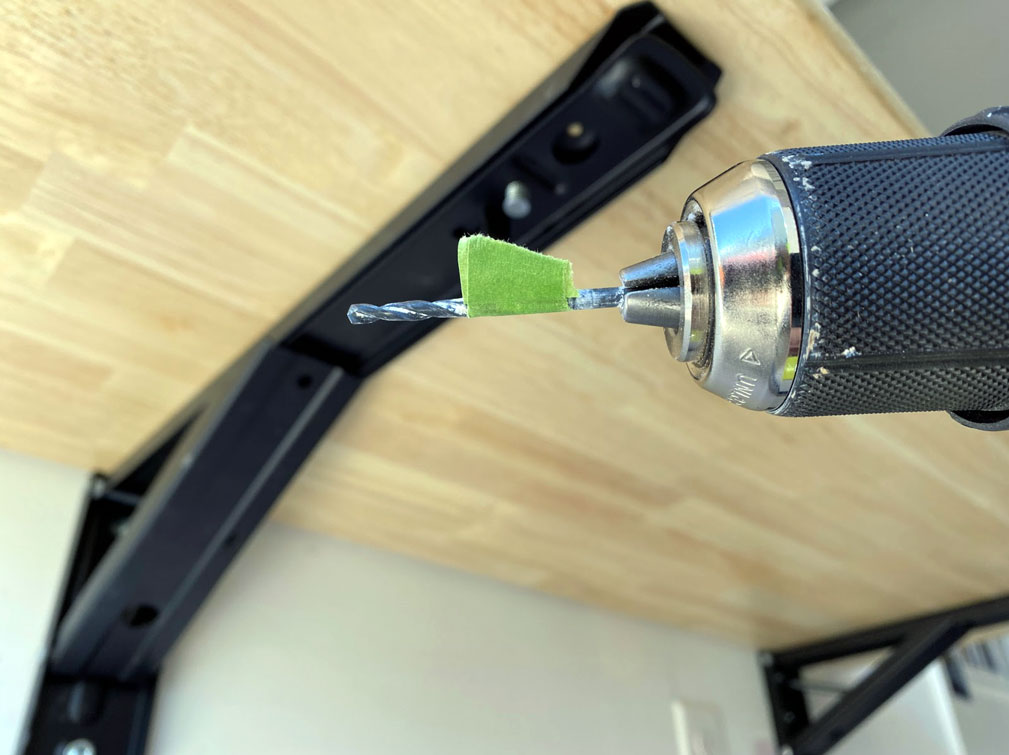
Pro Tip: Use a piece of painters tape to mark the depth of your pilot hole to stop from drilling completely through the top.
Use a screwdriver to attach the final 6 screws and complete the installation.
Pro Tip: Use a screwdriver, not a drill driver, to attach these screws. This will lessen the likelihood of striping the head of the screws.
SUPER Pro Tip: Attaching screws to hardwoods can be difficult. Apply some chapstick to the treads of the screws to make things go more smoothly.
Step 8 – Bask in the Space Saving Awesomeness
To fold, lift the top up slightly while pressing the release taps at the end of the bracket, then lower the top until flush with the wall. To open, lift the top until you hear it click into place.